Boating Knots: 10 Essential Knots Every Boater Should Know
Knowing how to tie different boating knots doesn’t always feel important when the water’s calm and everything’s easy.
This guide breaks down 10 essential boating knots you’ll actually use for docking, anchoring, towing, and securing gear, with quick context on what each one is designed to do (fixed loops, joining two lines, or stopper knots). We’ll also wrap up with a few practical tips for keeping bulky gear secure and out of the way on board, but first, let’s get into the knots.
Introduction to Boating Knots
Boating knots are simple ways to tie a line for specific jobs. Some make a strong loop, some tie a line to a cleat (the metal tie point) or ring, some connect two lines, and some keep a line from sliding through a hole or piece of hardware. Once you know what each type is meant to do, picking the right knot gets a lot easier, and you’ll start noticing you use the same few knots all the time.
Common situations where knots matter:
- Docking at a marina and tying the front, back, and side lines to cleats or posts
- Tying up to a mooring ball by clipping or tying your line to the ring on the buoy
- Tying boats together when you’re hanging out on the water
- Anchoring overnight and keeping the anchor line secure at the front of the boat
- Towing a small boat so it doesn’t drift away or come loose
- Tying fenders so they stay in place and protect the side of your boat
Modern ropes like nylon and other synthetics are strong and durable, but the knot is often what determines whether the setup feels secure. If a knot isn’t tied neatly and pulled tight, it can slip, jam up, or become a pain to undo after it’s been under tension.
In the sections below, you’ll learn 10 practical knots every recreational boater should know, plus some tips on when to use each one and common mistakes to avoid. Let’s get started!
1. Bowline: A Strong Loop That Will Not Slip
The bowline is popular for a reason. It makes a strong loop at the end of a rope that holds tight when there’s tension, but is usually still easy to untie later, even if it gets wet and pulled hard.
Common uses:
- Tying a rope to a post or ring
- Making a loop you can clip to hardware with a clip or carabiner
- Making a temporary loop to help hold onto someone or secure gear in an emergency
The bowline works well with most common rope sizes and materials and has a long history of being used in safety and rescue situations.
Easy way to remember it: A lot of people learn it with the phrase, “The rabbit comes up through the hole, around the tree, and back down the hole.” The hole is the small loop you make first, the rabbit is the free end of the rope, and the tree is the long part of the rope.
Avoiding mistakes: Look at the finished knot before you trust it. If it’s tied incorrectly or not pulled tight neatly, it can slip. Leave a decent tail and make sure the free end sits neatly alongside the knot.
2. Cleat Hitch: The Go-To Tie Off for Docking
If there’s one knot you should know first, it’s probably the cleat hitch. This is the standard way to tie a dock rope to a cleat, whether it’s on the dock or on the boat.
Where it is used:
- Tying up at a dock, marina, or fuel dock
- Securing the anchor rope to a cleat
- Holding the boat in place with lines that keep it from sliding forward or backward
How it works: Wrap the rope once around the base of the cleat. Then make a neat figure eight over the two arms of the cleat. Finish with a locking loop on top so it stays put.
A good cleat hitch holds tight without a huge pile of wraps. Too many wraps or skipping the final lock can make it jam or slip.
Quick check: It should look clean and flat, with a clear figure eight pattern and one final locking loop on top.
3. Clove Hitch: Fast Tie for a Rail or Post
The clove hitch is a quick way to tie a rope to a rail, post, or pole. It’s great when you need something temporary, and you might want to move it or adjust it.
Common uses:
- Tying fenders to a rail so they protect the side of the boat
- Holding a rope on a dock post for a moment while you get the boat situated
- Hanging a coiled rope on a rail to keep it tidy
You can tie a clove hitch by wrapping the rope around the post, or by making two loops and dropping them over a rail. With practice, you can even tie it one-handed.
Main downside: A clove hitch can loosen if the rope goes slack or the pull shifts. To lock it in, add a half hitch, which is just one extra wrap, and tuck it around the rope.
Quick habit: If you are using it for fenders or anything that will bounce around, check it once in a while. A loose fender line can slide and let the boat rub.
4. Round Turn and Two Half Hitches: Strong & Reliable
When you need a rope to stay tied to something solid for a longer time, this is one of the best choices. It’s more secure than a clove hitch, especially when the boat is moving with wind and waves.
How it works: First, wrap the rope all the way around the post or ring once. That full wrap takes most of the strain and helps reduce rubbing. Then tie two half hitches around the long part of the rope to lock everything in place.
This knot holds well, is fairly easy to adjust, and usually doesn’t jam as badly as some other knots after being pulled tight.
5. Figure Eight Stopper: Keeps a Rope from Sliding Out
A figure eight knot is a simple knot you tie at the end of a rope so it can’t slip back through hardware. Think of it as a safety stop.
Common uses:
- Keeping a sail rope from sliding all the way out through a pulley
- Stopping a dock rope from pulling through a guide on the boat
- Preventing smaller control lines from slipping out of their holders
People like the figure eight because it’s usually easier to untie than a basic overhand knot, and it’s less likely to pinch or damage the rope.
One thing to know: If it gets pulled very hard for a long time, it can still tighten up and be tough to undo. Even so, it’s usually easier to remove than an overhand knot that has been loaded.
Good habit: Put a stopper knot on the free end of any important rope. It is a small step that can save you from bigger problems later.
6. Two Half Hitches: Simple Tie Off for Light Duty
Two half hitches are a quick way to tie a rope to a post or ring. One half hitch by itself isn’t very secure, but two in a row hold well for lighter jobs or as a backup.
Common uses:
- Adding a backup to a clove hitch so it does not loosen
- Tying a small boat, kayak, or gear line to a cleat or rail
- Securing light-duty ropes on board
This knot tightens when the rope is under tension, so it works best when you want something simple that stays put, and you do not need to adjust it often.
Good habit: If you tie a knot that could loosen, add two half hitches as a quick backup. It’s an easy way to add safety without much extra effort.
7. Sheet Bend: Joining Two Ropes Together
If you need to connect two ropes, the sheet bend is one of the best knots to know. It works especially well when the ropes are different sizes.
Common uses:
- Extending a rope that is too short
- Attach a thin helper rope to a thicker rope so you can pull it through a tight spot
- Connecting two ropes for a short-term job
For most everyday use, the basic sheet bend is enough. If the rope is very slick or the sizes are very different, use a double sheet bend for extra grip.
Easy way to picture it: Make a loop with the thicker rope. Run the thinner rope up through the loop, around the back, and tuck it under itself.
One caution: Knots are great for temporary jobs, but not ideal for permanent ones. For a long-term connection, a professionally joined rope will hold better. For temporary use, the sheet bend works great for many things.
8. Reef Knot (Square Knot): Good for Bundling, Not for Pulling
The reef knot, also called the square knot, is one of the most misunderstood knots. It works well for tying two ends of the same rope around something, but it is not a safe choice for joining two ropes when there’s a strong pulling force.
Good uses:
- Tying up a rolled cover
- Bundling extra ropes or hoses for storage
- Tying small items in place for a short time when conditions are calm
What can go wrong: If you use this knot for towing, tying up a boat, or anything under heavy strain, it can flip and come undone. This is even more likely with slick modern rope.
How to tie it correctly: Use the pattern “right over left, then left over right.” When it is correct, both ends of the rope come out on the same side. If the ends come out on opposite sides, that is a granny knot, and it is weaker.
Bottom line: The reef knot is fine for small, low-stress tasks. Do not rely on it for any load-bearing tie.
9. Rolling Hitch: Grips Another Rope Without Sliding
A rolling hitch lets you tie one rope onto another rope, or onto a rail or pole, so it holds tight in one direction. It is useful when you need to add grip or take pressure off something without fully undoing the main rope.
Common situations:
- Taking pressure off a rope that is stuck so you can fix it
- Moving the anchor rope to a better spot for pulling
- Adjusting tension on a rope without untying the main connection
Why it works: It uses extra wraps that bite down when pulled from one direction. When the rope is slack, you can still slide it into position.
Key detail: Make sure the extra wraps face the direction from which the pull will come. If you tie it the wrong way, it will not grip as well.
10. Double Fisherman’s Knot: Very Strong Join for Thin Rope
The double fisherman’s knot is a small, very strong way to join two ropes that are about the same size. It’s especially useful with a thin or slick cord that can slip with other knots.
Common uses:
- Making a closed loop for tying down gear
- Joining two smaller safety lines
- Tying paracord or other thin cord for tie downs
This knot is made by tying two matching knots, one with each rope, so they slide together and lock tight when pulled.
Trade off: It is extremely secure, but it can be very hard to untie after it has been pulled tight. Use it when you do not need to take it apart later.
Safety reminder: Leave a decent tail on both ends and test it with a light pull before you rely on it.
Practicing and Remembering Your Boating Knots
Knowing about knots and being able to tie them quickly when things get busy are two different skills. The good news is that a little practice goes a long way, especially if you focus on the few knots you will use most often.
How to build muscle memory:
- Grab a 3 to 4-foot length of line with a visible weave
- Practice each knot at a table and focus on the sequence
- Once it feels natural, try tying it with your eyes closed
- Practice in different positions, like standing, sitting, and even one-handed
Start with these knots first, and what they are for:
- Cleat hitch: tying dock lines to cleats for docking and departures
- Bowline: making a strong fixed loop for attaching to hardware or creating a loop on the end of a line
- Clove hitch: quick temporary attachment, commonly for fenders or a fast tie to a rail or post. For longer periods or rough water, choose a more secure hitch (or back it up).
- Round turn and two half hitches: secure tie off to a piling, ring, or post when you want something reliable and less likely to slip
- Figure eight stopper: keeping lines from running out through blocks, fairleads, or other hardware
Keep a small knot guide (Download a knot App onto your mobile device) on the boat where it’s easy to grab, like in the glove box or with your dock lines. And if friends or family help you tie up, show them the basics too. When more than one person knows a couple of key knots, docking goes a lot smoother.
And if you want to get comfortable faster, practice with a picture or video pulled up on your phone. Tie the knot, then compare it to the example and give it a firm pull to make sure it holds. That quick check builds confidence before you use it on the water.
Knots Are Only Part of a Good Setup
Once you’ve got a few core knots down, you’ll notice most rope work on a boat comes down to two things. One is handling the boat, like docking, anchoring, and towing. The other is keeping gear secure so it does not slide around, bang into things, or get in the way when you are moving or tied up with friends.
Knots help with both, but bulky gear brings its own challenges. Before we get into racks and storage systems, we’ll cover a few simple habits that make a big difference, like using the right tie-down points, avoiding putting strain on bimini frames and light railings, adding chafe protection where ropes rub, and doing a quick check after you get moving or hit rough water. Then we’ll look at board and gear storage options that reduce clutter and cut down on how often you need to retie anything.
Quick Tie Down Habits That Prevent Problems
Before you worry about fancy setups, a few small habits will keep gear more secure and save your lines from unnecessary wear.
- Use true tie-down points like cleats, eyes, and strong attachment loops instead of grabbing whatever is nearby
- Avoid loading bimini frames and light railings since they are not built to take constant tension
- Add chafe protection anywhere a line rubs gelcoat, upholstery, or a sharp edge
- Keep lines short and tidy, so you’re not stepping over coils and loose tails
- Do a quick walkaround check after you get underway, after your first big wake, and any time you move gear around
Securing and Storing Boards, Kayaks, and Gear on Board
Common problems with knots and loose straps alone:
- Cluttered decks that create tripping hazards
- Damage to upholstery and gelcoat from shifting gear
- Gear moving in the wake or during rough seas
- Constant retying and adjustment throughout the day
Dedicated board and gear rack systems solve a lot of these headaches. They hold items securely off the deck and out of the way while underway or rafted up. A good rack setup also cuts down on the number of ad hoc lashings you need to tie in the first place, since the rack does the heavy lifting and your lines become simple backups.
How Manta Racks Helps Keep Gear Secure
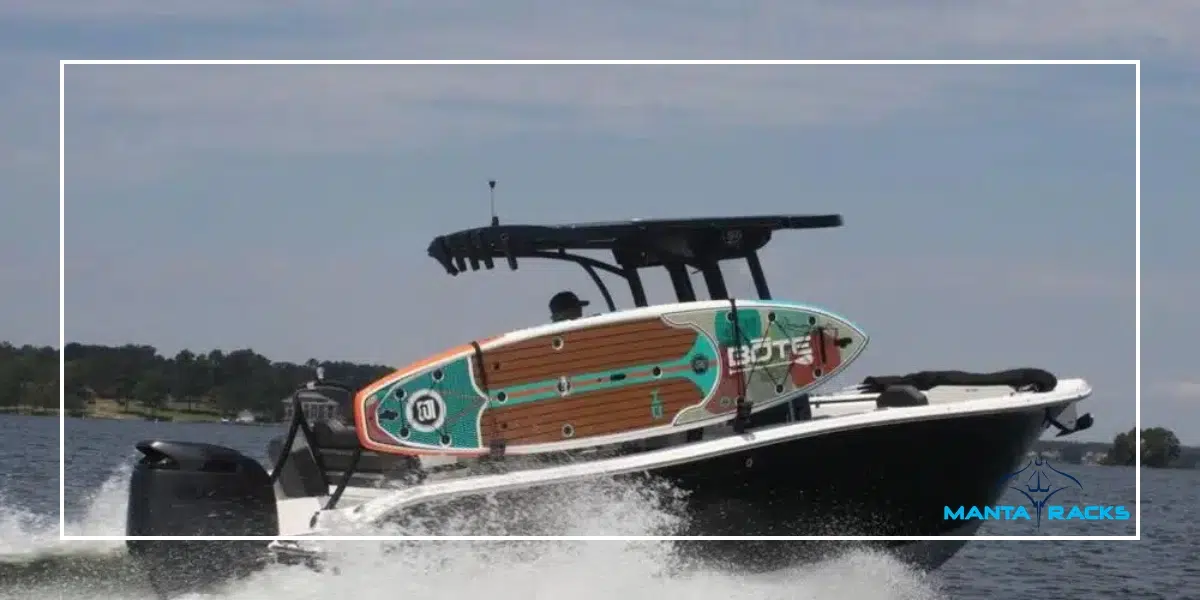
You bring wakeboards, surfboards, paddleboards, kayaks, and floating mats for one reason: to use them and have a good time. The last thing you want is a cluttered deck, gear sliding around in the wake, or having to re-strap everything every time you stop.
Popular Manta Racks systems include:
- Manta Racks S1 System: Built to carry one paddleboard
- Manta Racks S2 System: Built to carry two paddleboards
- Manta Racks L2K System: Built for kayaks and LIVE Watersports SUPs
- Manta Racks B2 System: Built for wakeboards, skis, and similar board gear
- Manta Racks FM System: Built to carry floating mats securely
A dedicated rack gives bulky gear a consistent home on board, which means less shifting in wakes and fewer mid-day adjustments. If you’re ready to clear the deck and make storing your gear easier and safer, explore Manta Racks systems and choose the setup that fits your boat.